- Published on Wednesday, November 27, 2024, last updated
GitHub Branching and Merging: A Step-By-Step Guide
A key feature of GitHub is its ability to manage GitHub branches effectively through its branching and merging system, which helps teams work on different aspects of a project without disrupting the main codebase. Whether you're creating a GitHub new branch for a new feature, resolving merge conflicts, or reviewing changes, understanding GitHub's branching and merging capabilities is essential for seamless collaboration.
In this guide, we'll explore the fundamentals of GitHub branching and how to merge branches in GitHub efficiently. You'll learn how to handle tasks such as comparing branches, managing merge conflicts, and even restoring a deleted branch. With a step-by-step approach, we'll cover:
- How to create and switch between branches in GitHub
- Making changes and reviewing
- The best practices for merging branches, including how to delete a branch after a merge
- Handling advanced scenarios, like how to restore a deleted branch in GitHub or rename a branch
By the end of this article, you'll have a clear understanding of merging branches in GitHub, why it’s a critical part of version control, and how it can boost your development efficiency. Let’s dive in!
Table of Contents
What is GitHub Branching?
How to Create a New Branch in GitHub
Creating a new branch in GitHub is a simple yet essential step for managing different features or fixes within your project. By using GitHub branching, you can isolate your changes from the main codebase, ensuring that the primary branch remains stable.
Steps to Create a New Branch:
Using the GitHub Web Interface:
- Navigate to your repository on GitHub.
- Click the dropdown labeled
main(or the name of your current branch). - Clcik on
New Branchand enter its name in the text box and clickCreate branch. Your new branch is now ready.

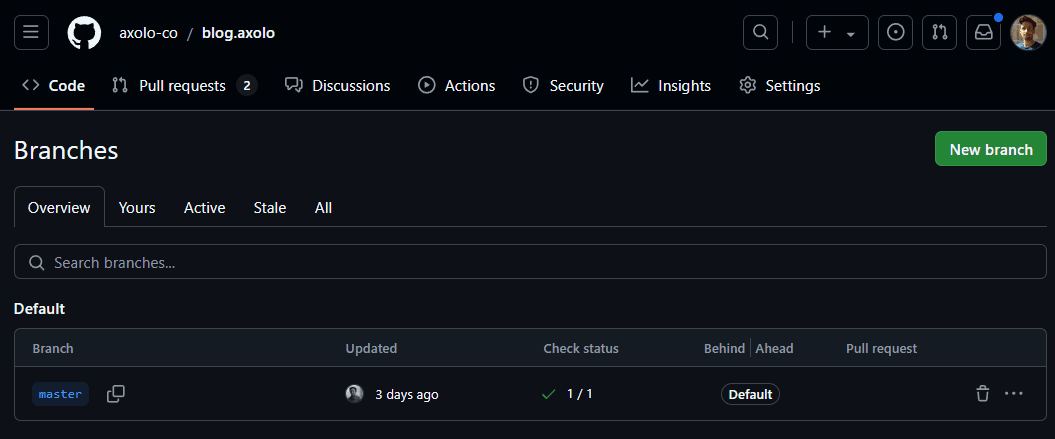
This is what it looks like in the GitHub UI. But I prefer using the terminal.
Using Git Command Line:
- Use the GitHub switch branch command to move to your desired base branch using:
git checkout <base-branch-name>
Alternatively, you can use git switch <base-branch-name>.
- Create a new branch with:
git branch <new-branch-name>
- Switch to the new branch using:
git checkout <new-branch-name>
Or, combine these steps with:
git switch -c <new-branch-name>
or (the one I use most)
git checkout -b <new-branch-name>
- Push Changes to GitHub: Once you've created your new branch and made changes, push it to the remote repository with:
git push --set-upstream origin <new-branch-name>
Now, your GitHub new branch is live and ready for development. This step ensures better collaboration and code management across your team.
Making Changes in a Branch
Once you've created a GitHub new branch, the next step is to start making changes specific to your task or feature. This process is one of the key benefits of GitHub branching, as it allows you to isolate your work from the main branch.
Steps to Make Changes in a Branch:
- Switch to the Branch: Before making changes, use the GitHub switch branch command to ensure you're working in the correct branch:
git switch <branch-name>
Alternatively, you can use:
git checkout <branch-name>
Make Changes to Your Files: Edit your project files as needed.
Stage and Commit Changes: Once changes are made, stage them for commit using:
git add <file-name> # Or use `git add .` to add all changes
Then commit your changes with a meaningful message:
git commit -m "Describe your changes here"
- Push Changes to GitHub: Push the changes in your branch to the remote repository:
git push
This ensures your team can access your updated branch and continue collaborating.
Reviewing and Comparing Changes
After committing your changes, it's important to review and compare them with other branches. GitHub provides tools to compare branches in GitHub, enabling you to see differences between your branch and the base branch. This is especially useful for identifying potential issues before starting the merging process.
To compare branches:
- Navigate to your repository on GitHub.
- Go to the Pull Requests tab and select "New Pull Request."
- Use the dropdowns to select the branches you want to compare.
This step ensures your branch is ready for integration. Before proceeding with merging branches in GitHub, confirm that your updates align with project requirements and don't introduce conflicts. This practice helps maintain code quality and streamlines the collaboration process.

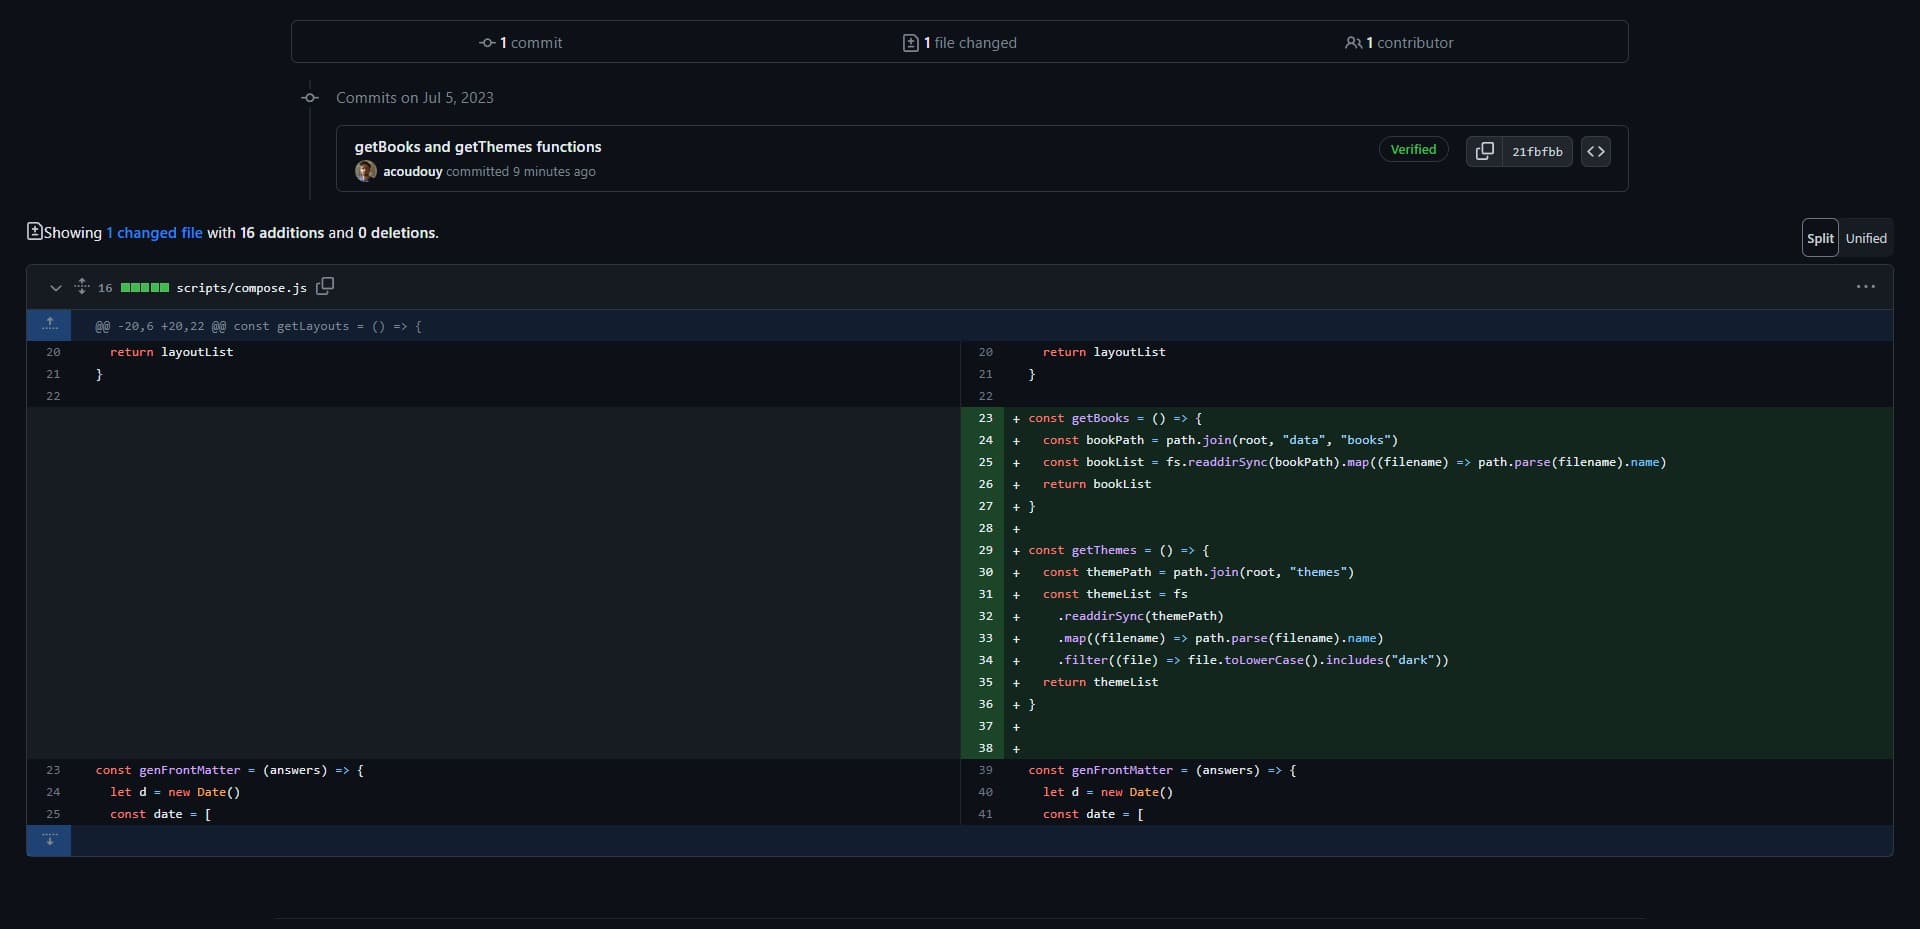
Your reviewers will see the changes you made in the pull request. Here, you can see the lines I added.
Understanding Merging in GitHub
Merging is a critical process in GitHub that integrates changes from one branch into another, typically combining feature branches into the main branch. This process ensures that updates made in separate GitHub branches are consolidated into a single, unified codebase.
What Happens During a Merge?
When you merge branches in GitHub, such as performing a GitHub merge branch to master, the changes from the source branch are applied to the target branch. GitHub tracks these updates through a "merge commit," which acts as a record of when the branches were combined. This process can be done through the GitHub web interface or using Git commands.
Types of Merging:
Fast-Forward Merge:
- If there are no diverging changes between the branches, Git will perform a fast-forward merge, integrating the updates without creating a merge commit.
Three-Way Merge:
- When there are divergent histories, Git creates a merge commit to combine the changes. This ensures a clear record of the integration process.
Steps to Merge Branches in GitHub:
Compare Branches: Use the GitHub compare branches feature to review differences and ensure compatibility between the branches.
Initiate the Merge:
- On GitHub, create a pull request to propose merging the changes.
- Assign reviewers if necessary for code review and approval.
Resolve Conflicts (if any): If conflicts arise, GitHub provides tools to resolve them directly in the web interface or through your local environment. Proper conflict resolution is crucial for a successful merging branches GitHub process.
Complete the Merge: Once approved, merge the pull request by merging the branch in GitHub. Optionally, delete the branch after merge to keep your repository clean and organized.
Why Merging Matters
Merging changes plays a pivotal role in collaboration, as merging branches in GitHub helps teams consolidate changes. It ensures that changes from multiple developers or feature branches are integrated efficiently. Proper use of GitHub branching and merging practices keeps your project aligned and minimizes disruptions to the main branch.
Enable your team to mergepull requests faster with Axolo
Why Merge?
Merging is an integral part of version control, allowing teams to consolidate changes from multiple GitHub branches into one cohesive codebase. Whether you're working on new features, fixing bugs, or addressing issues, Merging ensures that updates are integrated smoothly without losing any work, a key benefit of the ability to merge branches GitHub provides.
However, merging isn’t always seamless. When changes overlap or conflict, merge conflicts can occur. Understanding how to handle these conflicts is key to successful collaboration and efficient merging branches in GitHub workflows.
Handling Merge Conflicts
Merge conflicts happen when Git cannot automatically reconcile changes in two branches. This often occurs when:
- The same file is modified in both branches.
- Changes are made to the same line of code in both branches.
- A file is deleted in one branch but modified in another.
Steps to Resolve Merge Conflicts:
Identify Conflicts:
- Git will notify you of conflicts during a merge attempt. In GitHub, conflicts are highlighted directly in the pull request interface.
- Locally, Git will mark the conflicting files and insert conflict markers (e.g.,
<<<<<<<,=======,>>>>>>>) into the code.
Review and Edit Conflicts:
- Open the conflicting files and decide which changes to keep or how to combine them.
- Edit the file to remove conflict markers and ensure the code is correct.
Stage and Commit Resolved Files:
- After resolving conflicts, stage the updated files:
git add <conflicted-file>
- Commit the changes:
git commit -m "Resolved merge conflicts"

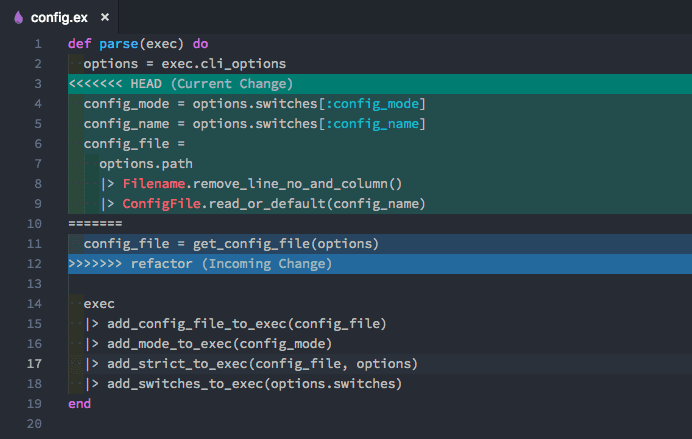
In code editor such as VSCode, you can see the conflict markers in the file.
- Complete the Merge: Push the resolved branch to GitHub and finish the merge process.
Tips to Avoid and Handle Merge Conflicts:
- Regularly pull updates from the main branch into your working branch to minimize divergence.
- Use GitHub compare branches to identify potential conflicts early.
- Communicate with your team to coordinate changes effectively.
By mastering conflict resolution and following best practices for merging branches in GitHub, you can keep your development process smooth and collaborative.
How To Merge Branches in GitHub: Step-by-Step
Preparing Your Branches for a Merge
Before merging branches in GitHub, it's crucial to ensure everything is ready for integration. Follow these steps:
Ensure Up-to-Date Branches:
- Use
git pullto fetch the latest changes from the remote repository for both the source and target branches. - Regularly pull updates into your working branch to minimize conflicts.
- Use
Test Changes:
- Verify that your branch builds and runs successfully.
- Run tests to ensure that your changes won't break the main branch.
Clean Up the Branch:
- Remove unnecessary commits and squash them if needed.
- Use descriptive commit messages for better collaboration.
Comparing Branches in GitHub Before Merging
The compare branches in GitHub feature helps you review changes and identify potential conflicts before merging:
Navigate to Compare View:
- Go to your repository and click on the "Pull requests" tab.
- Select "New Pull Request" and choose the branches you want to compare.
Analyze the Differences:
- Review the changes, including added, modified, and deleted files.
- Look for potential conflicts that might require manual resolution.
Request Feedback:
- Share the comparison with team members for feedback.
- Use GitHub comments or reviews to discuss changes.
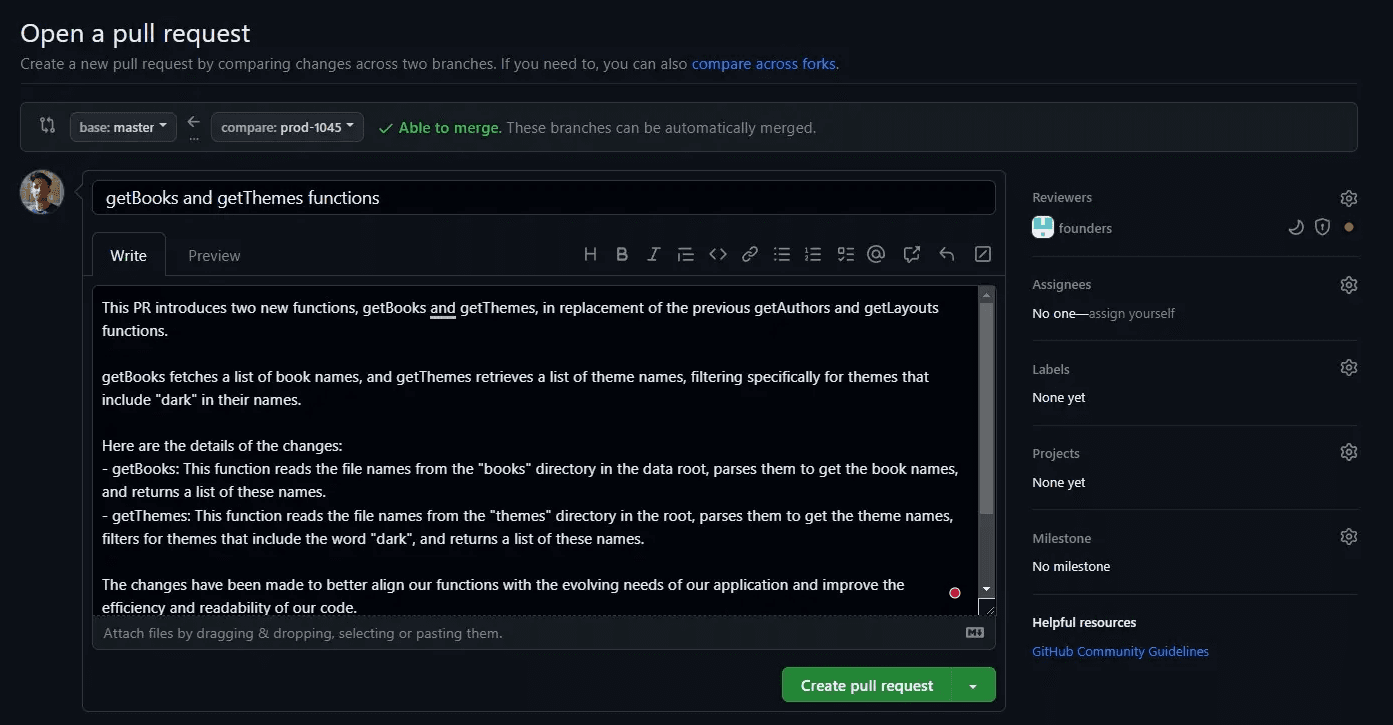
Initiating a Pull Request for a Merge
A pull request is the standard way to merge branches in GitHub. Here's how to initiate one:
Open a New Pull Request:
- Navigate to the repository’s Pull requests tab and click "New Pull Request."
- Select the source branch and target branch.
Provide a Title and Description:
- Use a clear title and detailed description to explain the purpose of the merge.
- Highlight key changes made in the GitHub new branch.
Add Reviewers and Labels:
- Assign reviewers for code review.
- Apply labels (e.g., "bug fix" or "feature") to categorize the pull request.
Submit the Pull Request:
- Click
Create Pull Requestto start the review and merging process.
- Click

Resolving Merge Conflicts in GitHub
Merge conflicts can occur when GitHub cannot automatically reconcile changes between branches. Here's how to resolve them:
Identify Conflicts:
- GitHub will highlight conflicts in the pull request view.
- Locally, Git marks conflicts with conflict markers (
<<<<<<<,=======,>>>>>>>).
Resolve Conflicts:
- Open the conflicting files and review the changes.
- Decide which changes to keep or combine.
- Edit the file to remove conflict markers and save your resolution.
Stage and Commit Resolved Files:
- Stage the resolved files:
git add <file>
- Commit the resolution:
git commit -m "Resolved merge conflicts"
Push Changes:
- Push the resolved branch to GitHub:
git push
- Continue the Merge:
- In GitHub, complete the pull request once conflicts are resolved.
Completing the Merge and Deleting a Branch
After resolving conflicts and finalizing the merge, it’s best to delete the source branch to keep your repository clean:
Merge the Pull Request:
- Click the “Merge Pull Request” button in GitHub.
- Confirm the merge to integrate changes into the target branch.
Delete the Branch:
- After merging, GitHub provides an option to delete the branch after merge directly from the pull request page.
- Alternatively, delete the branch locally and on GitHub:
git branch -d <branch-name>
git push origin --delete <branch-name>
Deleting unused branches reduces clutter and ensures your repository remains organized.
Restoring a Deleted Branch After Merge (Optional)
If a branch is accidentally deleted after merging, you can ask GitHub to restore deleted branches:
Go to the Repository:
- Navigate to your repository and click on the “Branches” tab.
Find the Deleted Branch:
- Look for the branch under the "Recently Deleted" section (if available).
- GitHub retains deleted branches for a limited time.
Restore the Branch:
- Click the “Restore” button to recover the branch.
Alternatively, Restore Locally:
- If you have a local copy, you can push it back to GitHub:
git checkout <branch-name>
git push origin <branch-name>
Knowing how to restore a deleted branch in GitHub ensures you never lose valuable work, even after cleanup efforts.
Merge Commits
In GitHub, merge commits are created during the process of integrating one branch into another. Unlike individual commits made within a branch, a merge commit acts as a unique record of the combination of branches, preserving the history of both. It’s an essential feature of GitHub branching, providing transparency and traceability in your project’s evolution.
What Makes Merge Commits Unique?
When merging branches in GitHub, a merge commit:
- Preserves Context: Unlike fast-forward merges that skip creating a commit, merge commits maintain the full history of changes, making it clear when and why branches were merged.
- Tracks Conflict Resolution: If conflicts are resolved during the merge, the merge commit reflects these resolutions, acting as a single point of reference for the final integrated changes.
When Are Merge Commits Created?
Three-Way Merges:
- Merge commits are automatically created when there are diverging changes between branches. For example, when integrating a GitHub new branch with changes back into the main branch after simultaneous updates in both branches.
Pull Requests:
- Most pull requests in GitHub result in merge commits, especially when team members collaborate, review, and modify changes before merging.
Benefits of Using Merge Commits
Historical Clarity:
- Merge commits provide a clear timeline of when features were integrated. This is especially useful for teams working on multiple GitHub branches concurrently.
Better Debugging:
- By reviewing a merge commit, you can trace back to the exact branches and commits involved, making it easier to identify and resolve issues introduced during a merge.
Conflict Documentation:
- When resolving conflicts during merging branches in GitHub, merge commits act as a log of what changes were accepted and how conflicts were handled.
Managing Merge Commits
- Customizing Merge Commit Messages:
- Edit the merge commit message to include details about the branch being merged, the purpose of the merge, and any key notes for future reference.
- Deleting and Restoring Branches:
- After a merge, it’s a best practice to delete the branch after merge to keep your repository organized. However, if needed, you can always restore a deleted branch in GitHub.
Merge Commit vs. Fast-Forward Merge
- Merge Commit:
- Keeps a detailed history, making it ideal for collaborative teams or long-running branches.
- Fast-Forward Merge:
- Skips creating a merge commit when no divergence exists, suitable for quick, linear updates.
By understanding and utilizing merge commits, you can ensure a well-documented, organized, and efficient workflow in your GitHub projects.
Enable your team to mergepull requests faster with Axolo
Best Practices for Branching and Merging in GitHub
Effective use of GitHub branching and merging strategies is essential for maintaining a clean, collaborative, and efficient codebase. Following best practices ensures smoother workflows, minimizes conflicts, and makes it easier for teams to track and manage changes.
1. Use Descriptive Branch Names
- Name your branches clearly to reflect their purpose, such as
feature/add-loginorbugfix/fix-auth-issue. - If needed, you can always change branch name in GitHub to improve clarity.
2. Keep Branches Focused and Small
- Limit each branch to a single feature or fix. This makes it easier to review and merge, reducing the chance of conflicts when merging branches in GitHub.
3. Regularly Update Your Branch
- Frequently pull updates from the main branch into your working branch:This minimizes conflicts when you merge and keeps your branch up-to-date.
git pull origin main
4. Review Changes Before Merging
- Use the GitHub compare branches tool to analyze changes before merging.
- Conduct thorough code reviews to ensure quality and consistency.
5. Resolve Merge Conflicts Properly
- If conflicts arise, handle them immediately to avoid delays.
- Document decisions within the merge commit for future reference.
6. Delete Branches After Merging
- Once merged, you can automatically ask GitHub to delete branch after merge to remove outdated branches:
git branch -d <branch-name>
- This keeps your repository clean and focused on active development.
7. Use Pull Requests for Collaboration
- Always initiate a pull request when merging branches in GitHub, even for minor updates. Pull requests create a platform for team discussions, code reviews, and approvals.
- Assign reviewers to provide feedback and ensure that all changes meet project standards before merging.
8. Coordinate with Your Team
- Effective communication is key to avoiding conflicts and overlapping work. Use tools like GitHub issues and project boards to track progress and assign tasks.
- Regularly discuss branch updates and merge plans during team meetings to ensure alignment.
9. Plan for Long-Running Branches
- For branches that will stay active for extended periods, such as release or feature branches, regularly pull updates from the main branch:
git pull origin main - This practice minimizes conflicts and ensures that long-running branches remain compatible with the latest changes.
10. Leverage GitHub Features for Efficiency
- Take advantage of GitHub's built-in tools to streamline your workflow:
- There is a feature where GitHub deletes branch after merge automatically.
- If you mistakenly delete a branch, the GitHub restore deleted branch option allows you to recover it quickly and prevent data loss.
- Add labels, milestones, and assignees to pull requests to improve organization and provide clarity for your team.
- These tools simplify branch management and enhance collaboration, ensuring that everyone stays aligned throughout the development process.
11. Maintain a Clean Commit History
- Avoid clutter in your repository by squashing commits when merging small or incremental changes. This keeps the project history concise and easier to navigate:
git merge --squash <branch-name> - Write clear and meaningful commit messages to document changes effectively.
12. Test Thoroughly Before Merging
- Always test your branch thoroughly to ensure stability and avoid introducing bugs into the main branch. Use automated testing pipelines if available to streamline this process.
- Address any issues in your branch before initiating a pull request or merging.
13. Understand Advanced Branching Techniques
- Explore advanced workflows like to manage complex feature development more efficiently.
- Stacked PRs allow you to break down large features into smaller, more manageable pull requests, improving code review and merge processes.
By adhering to these best practices, you can create a smoother and more collaborative development process, reducing errors and ensuring your team works efficiently on shared GitHub branches.
Axolo is a Slack app to help techteams review pull request seamlessly
Merge Branches Faster and More Efficiently with Axolo
Efficient collaboration and seamless are critical for software development teams, and Axolo provides the ultimate solution. As the most-used GitHub Slack bot for code reviews, Axolo bridges the gap between GitHub and Slack, ensuring faster merges and improved team communication.
Why Choose Axolo?
Axolo is designed to streamline the GitHub code review process by centralizing discussions, reducing delays, and enhancing productivity. Here's how Axolo helps your team merge branches more efficiently:
Dedicated Pull Request Channels:
- Each GitHub pull request is assigned a dedicated ephemeral Slack channel, allowing all discussions to stay in one place. This eliminates context-switching and keeps your team focused on resolving issues and merging faster.
Automated Notifications and Reminders:
Improved Collaboration:
Key Features of Axolo
Daily GitHub PR Reminders: Keep your team informed with scheduled reminders about stale or pending pull requests, ensuring reviews are completed on time.
Customizable Notifications: Tailor notifications for GitHub actions like PR status changes, branch conflicts, or CI/CD results, so your team stays informed without distraction.
Code Review Time Slots: Schedule code review notifications during specific times to avoid interruptions and maintain developer focus.
PR Recaps for Stand-Ups: Receive daily pull request summaries in Slack channels to organize stand-ups and keep everyone accountable.
Dedicated Support and Onboarding: Get personalized assistance and comprehensive onboarding through to ensure your team maximizes the benefits of the platform.
Axolo User Experiences
2480+ developers online
